Welcome to BackupEase! This guide will walk you through installing the plugin, understanding its core functions, and performing your very first backup. BackupEase helps you protect your website by creating copies of your files and database, and the Pro version adds powerful features like advanced cloud storage and one-click site migration.
1. Installation and Activation
To get started, you’ll need to install both the free BackupEase plugin and the BackupEase Pro add-on.
Step 1: Install BackupEase (Free Version)
- Log in to your WordPress admin dashboard.
- Go to Plugins > Add New.
- In the search bar, type “BackupEase” and press Enter.
- Find “BackupEase” by PrecisionWP and click “Install Now”.
- Once installed, click “Activate”.
Step 2: Install BackupEase Pro (Add-on)
- Important: BackupEase Pro requires the free BackupEase plugin to be installed and active.
- You should have received a
.zipfile for BackupEase Pro after purchase.
- From your WordPress admin dashboard, go to Plugins > Add New.
- Click the “Upload Plugin” button at the top of the page.
- Click “Choose File”, then select the
backupease-pro.zipfile from your computer. - Click “Install Now”.
- Once installed, click “Activate Plugin”.
After activating both plugins, you will see a new “BackupEase” menu item in your WordPress admin sidebar.
2. Your First Backup: Peace of Mind in a Click
Creating your first backup is incredibly simple. This process will create a full copy of your website’s database and files.
- From your WordPress admin sidebar, click on BackupEase. This will take you to the Dashboard.
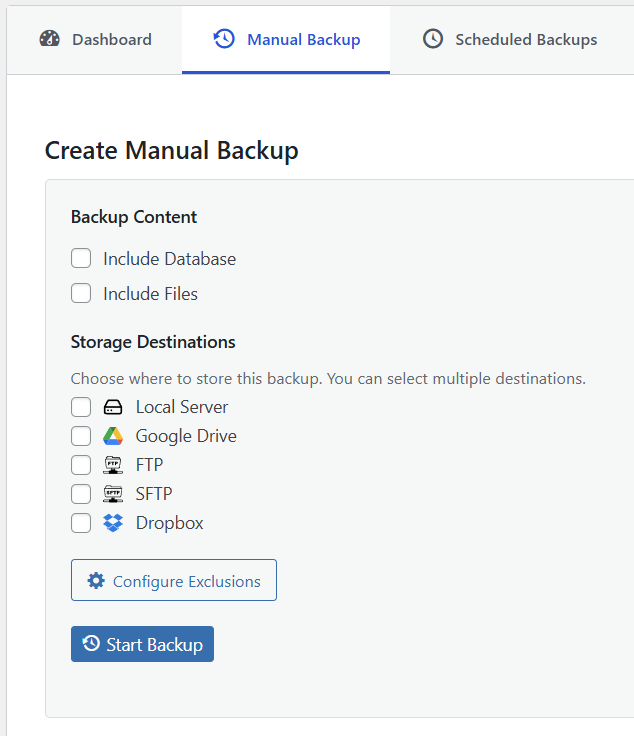
- On the Dashboard, locate the large, green “Create Backup” button.
- Click “Create Backup”.
What Happens Next?
BackupEase will immediately start working. You’ll see a progress bar indicating the current phase (e.g., “Dumping database…”, “Zipping files…”, “Uploading…”).
- Automatic Detection: BackupEase intelligently detects your server’s capabilities. If your server supports WP-CLI (a command-line tool for WordPress), it will use that for the fastest and most efficient backup. If not, it will automatically switch to a PHP-based method that works on all hosting environments, processing your site in smaller chunks to avoid timeouts.
- Real-time Progress: The progress bar will update in real-time, showing you exactly what’s happening.

Once the backup is complete, the progress bar will show 100%, and you’ll receive a success message.
3. Finding Your Backups
After a backup completes, it’s stored and listed in the Recent Backups.
- From the BackupEase menu, click on “Dashboard”.
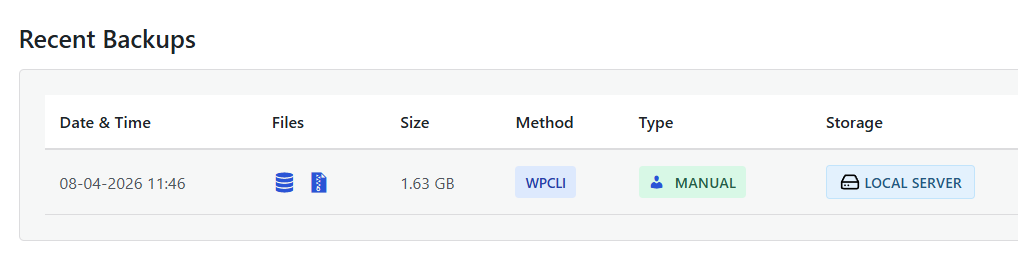
- Here, you’ll see a list of all your completed backups, including the date, size, and status.
- You can download your database (
.sql) and files (.zip) separately from this screen. This is useful if you need to manually restore your site or move it to another location. - You can also delete old backups to free up space.
4. Important Considerations & Caveats
While BackupEase makes backups easy, understanding these points will help you use it effectively:
- Disk Space: Backups require temporary storage space on your server. BackupEase creates a staging directory (
wp-content/backupease-staging/) where it builds your backup files. Ensure your hosting account has enough free disk space (at least 1.5 times your website’s total size) for this process.- Caveat: If your server runs out of disk space during a backup, the process will fail.
- Server Resources (Aggressiveness): Backing up a website can be resource-intensive. BackupEase has an “Aggressiveness” setting (found under BackupEase > Settings) that controls how much server power it uses.
- Low: Uses fewer resources, takes longer. Best for shared hosting.
- Medium (Default): A balanced approach.
- High: Uses more resources, completes faster. Best for dedicated servers or VPS.
- Caveat: On shared hosting, setting aggressiveness too high might lead to timeouts or temporary resource limits imposed by your host.
- WP-CLI and PHP
exec(): For optimal performance, BackupEase prefers to use WP-CLI. This requires the PHPexec()function to be enabled on your server.- Caveat: Some shared hosting providers disable
exec()for security reasons. Ifexec()is disabled, BackupEase will automatically fall back to a PHP-based method, which is still reliable but might be slower for very large sites. You can check your server’s detected capabilities in BackupEase > Settings.
- Caveat: Some shared hosting providers disable
- Testing is Key: Always test your backup and restore process on a staging or development site before relying on it for your live production site. This ensures everything works as expected in your specific hosting environment.
5. Pro Feature: Advanced Cloud Storage
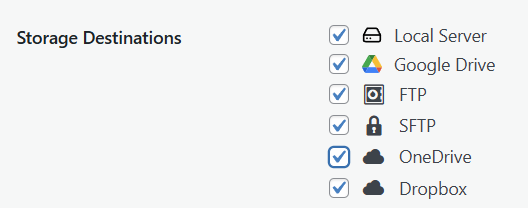
With BackupEase Pro, you’re not limited to storing backups only on your server. You can send them to various cloud services for extra security and redundancy.
- Supported Services: BackupEase Pro adds support for:
- FTP (File Transfer Protocol)
- SFTP (SSH File Transfer Protocol)
- Microsoft OneDrive
- Dropbox
- Configuration: You’ll find dedicated sections under BackupEase > Settings to connect these services. Once configured, you can select them as destinations when creating manual or scheduled backups.
We will cover configuring each of these advanced storage options in detail in a later article.
Next Steps
Now that you’ve successfully installed BackupEase and performed your first backup, you’re ready to explore more advanced features:
- Automated Scheduling: Set up daily, weekly, or monthly backups so you never forget.
- File Exclusions: Exclude unnecessary files (like cache folders) to make backups smaller and faster.
- Site Migration: Use the powerful one-click migration tool (Pro feature) to move your site effortlessly.